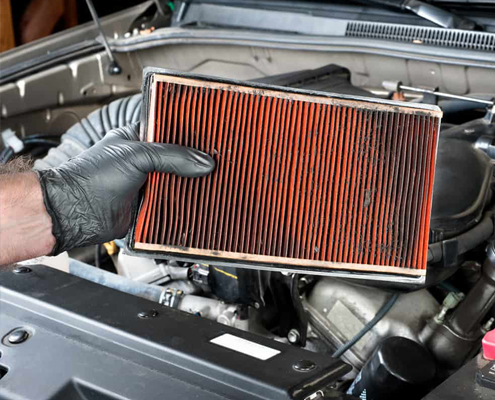
• Verification of Safety: When completing the following tasks, make sure you comprehend and follow all directions and personal safety precautions. Ask your technician what these are if you're not sure. To avoid doing harm to the car you are repairing, always heed any personal safety guidelines provided by the manufacturer. Important Note: Although the end user may be responsible for replacing the air filter if they ensure that the proper procedures are followed, the technical person is ultimately in charge of this. Changing the Sequence: • 1. Consult the service manual Determine the kind of filter that is needed. Every J.P.N. air filter has both its J.P.N. and OEM number (replace) printed on both the packing and the filter itself. 2. Lift the Hood 3. Find the air filter. typically located atop the engine. It comes in a rounded component for autos that have carburetors. Air filter housings on fuel-injected vehicles can be square or rectangular and may be located off to the side of the engine. • 4- Turn the screw. Alternately, remove the air filter housing's top clamp. Remove the air filter; it should be shaped like a circle or rectangle. Next, either shut the carburetor's lid or use a vacuum cleaner to clean the surrounding region. While you continue to clean the housing, this will prevent debris from getting into the carburetor or intake way. 5. Change the filter. Put in a fresh filter in place of the old one. After finding the OEM code by consulting your handbook, choose the appropriate J.P.N air filter. Take note: Written replacement method instructions are included on the packaging for all J.P.N. air products.

Happy Clients

Employees